
cPanel/WHM is a widely used control panel for managing web hosting environments on Linux servers. It provides a comprehensive interface for administrators and website owners to efficiently handle various aspects of their domains, including the crucial task of managing DNS (Domain Name System) records. This guide will walk you through the process of managing common DNS records such as A, MX, TXT, and CNAME within the cPanel interface, ensuring your domain services function correctly.
Here are the detailed steps to effectively manage DNS records through the cPanel control panel.
The first step in managing your DNS records is to access the appropriate tool within your cPanel account.
Begin by logging into your cPanel account. Typically, you can access it via a URL similar to http://your-domain.com:2083 or https://your-domain.com/cpanel, using the credentials provided by your hosting provider.
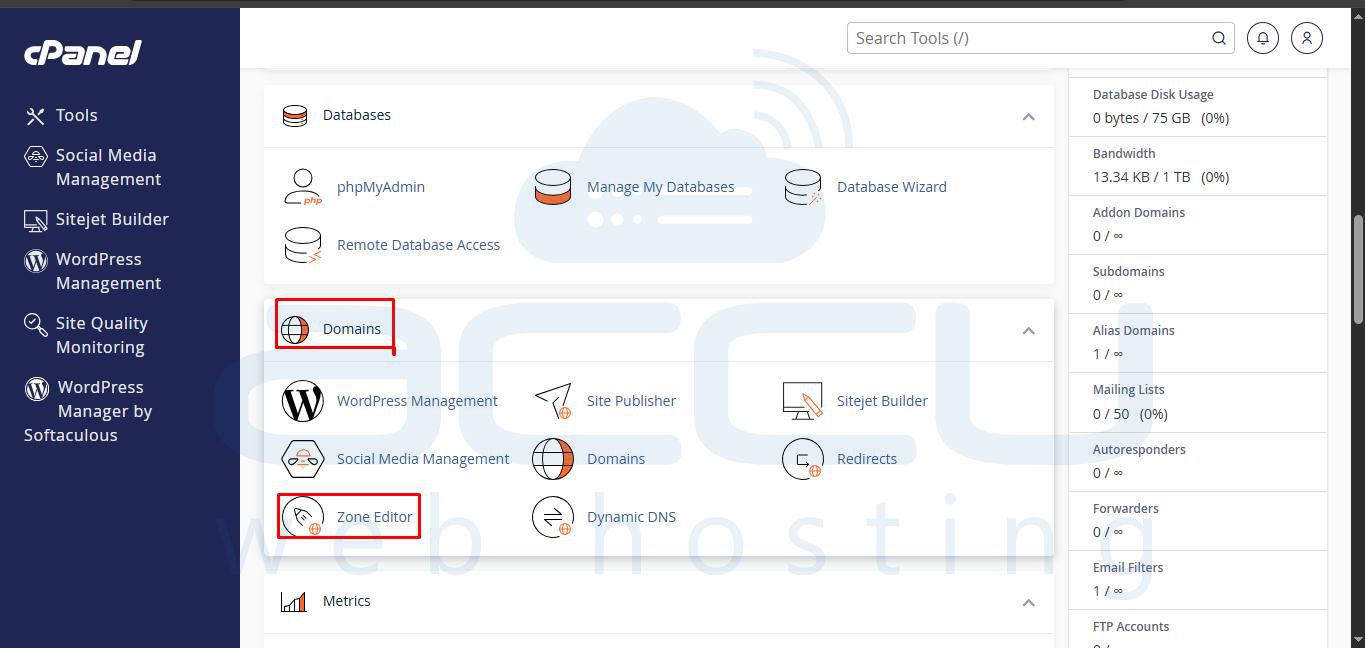
Once logged in, locate the Domains section. Within this section, click on the Zone Editor option. This tool is your gateway to configuring and managing all DNS records for your hosted domains.
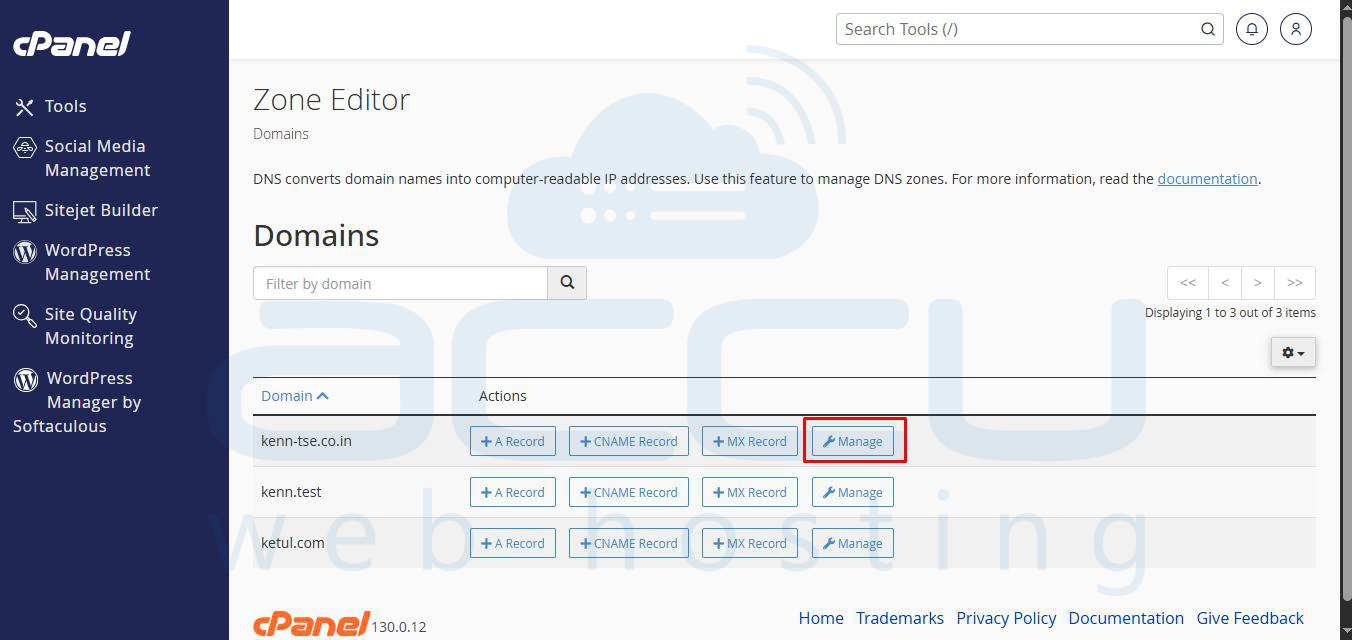
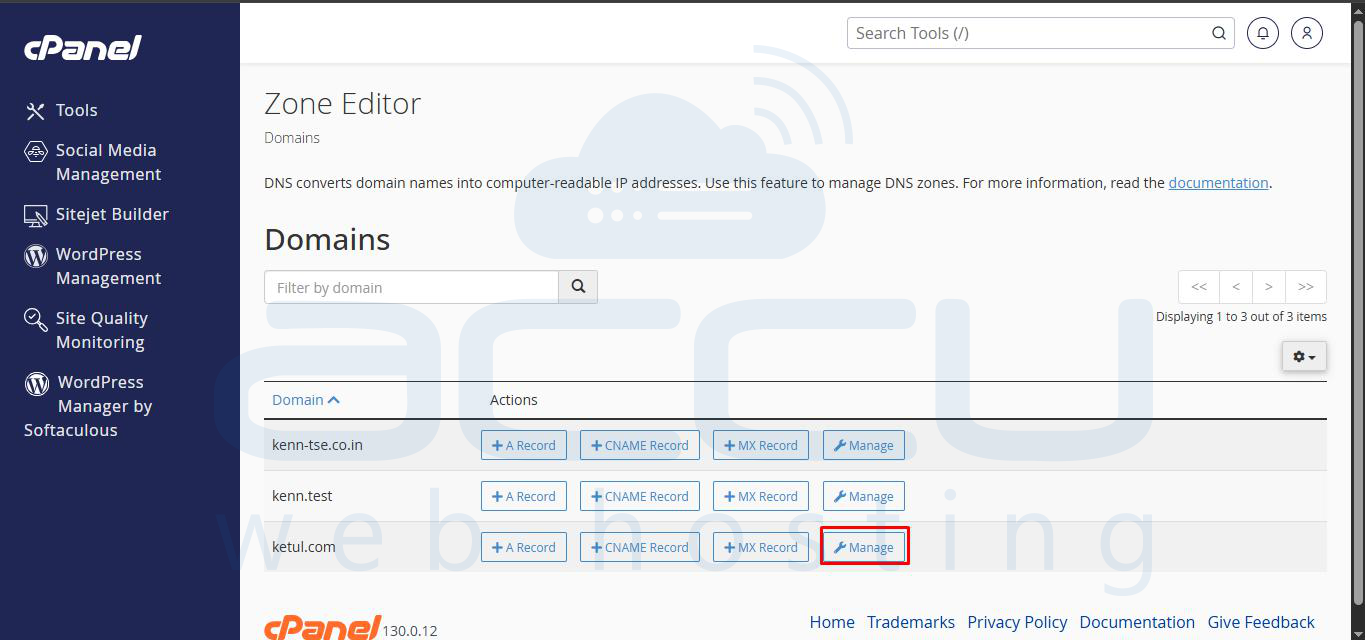
In the Zone Editor interface, you will see a list of your domains. Use the search function or browse to find the specific domain for which you intend to manage DNS records. For example, if you are managing demovpstest.com, select that domain.
Once you have identified the domain, click the Manage button associated with it. This action will open a detailed view where you can add, edit, or delete various types of DNS records for the chosen domain.
The Zone Editor allows you to easily create various types of DNS records. Each record serves a specific function in directing traffic and services for your domain.
An "A" record, or Address Record, is fundamental for pointing your domain or subdomain to an IP address. It links your domain name to the server hosting your website.
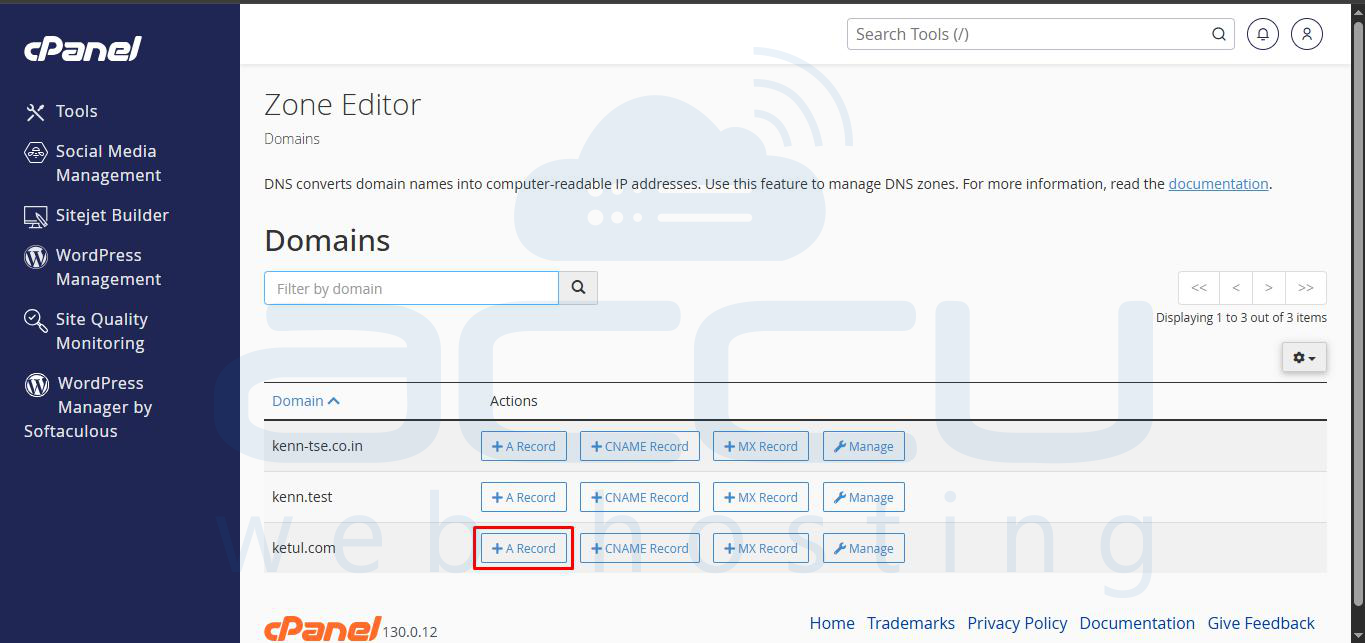
Within the domain's management interface, locate and click on the + A Record button or a similar option to initiate the creation of a new A record.
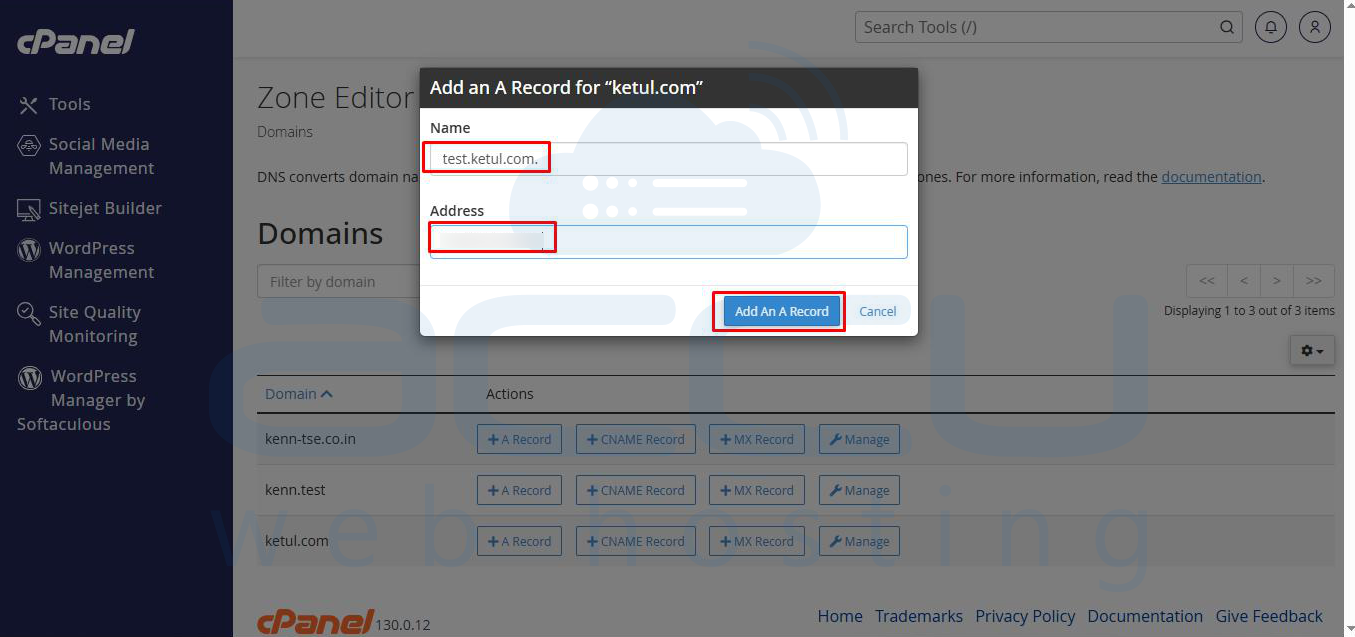
Enter the necessary information:
After entering these details, click the Add A Record button to save your changes.
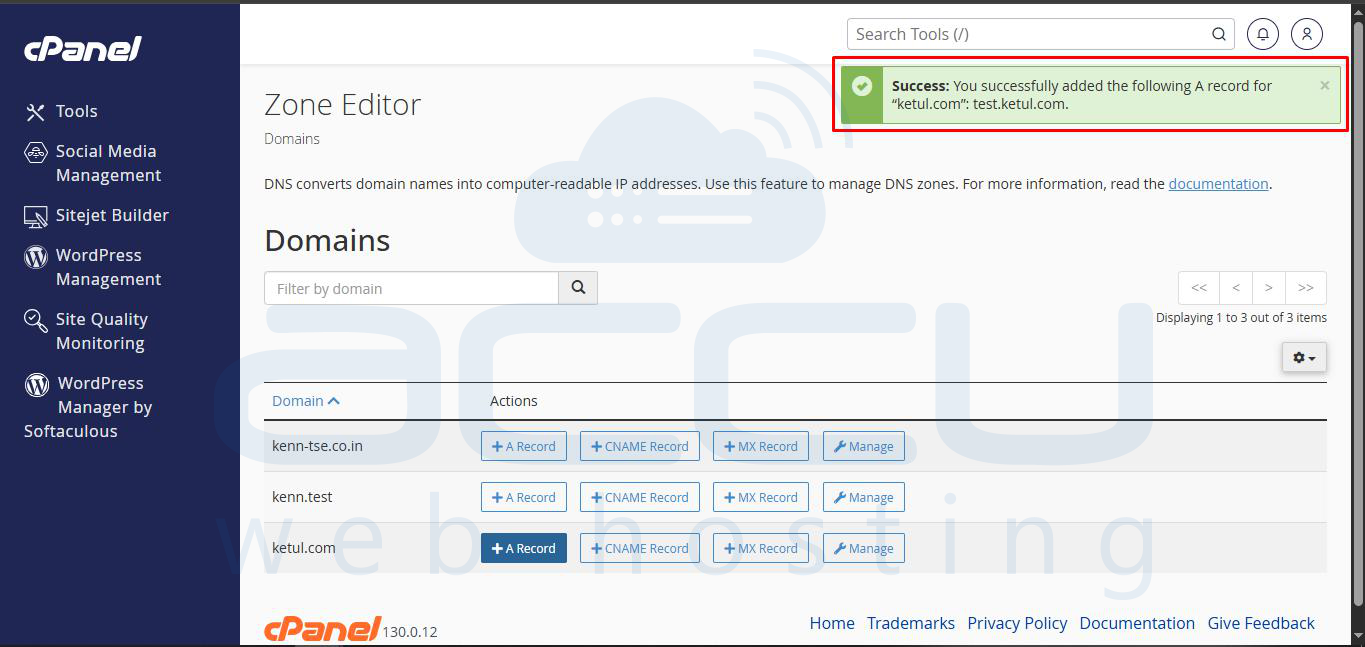
A CNAME record, or Canonical Name record, serves as an alias for one domain name to another. It's often used to link subdomains (like www) to the main domain.
Click on the + CNAME Record button within the Zone Editor interface.
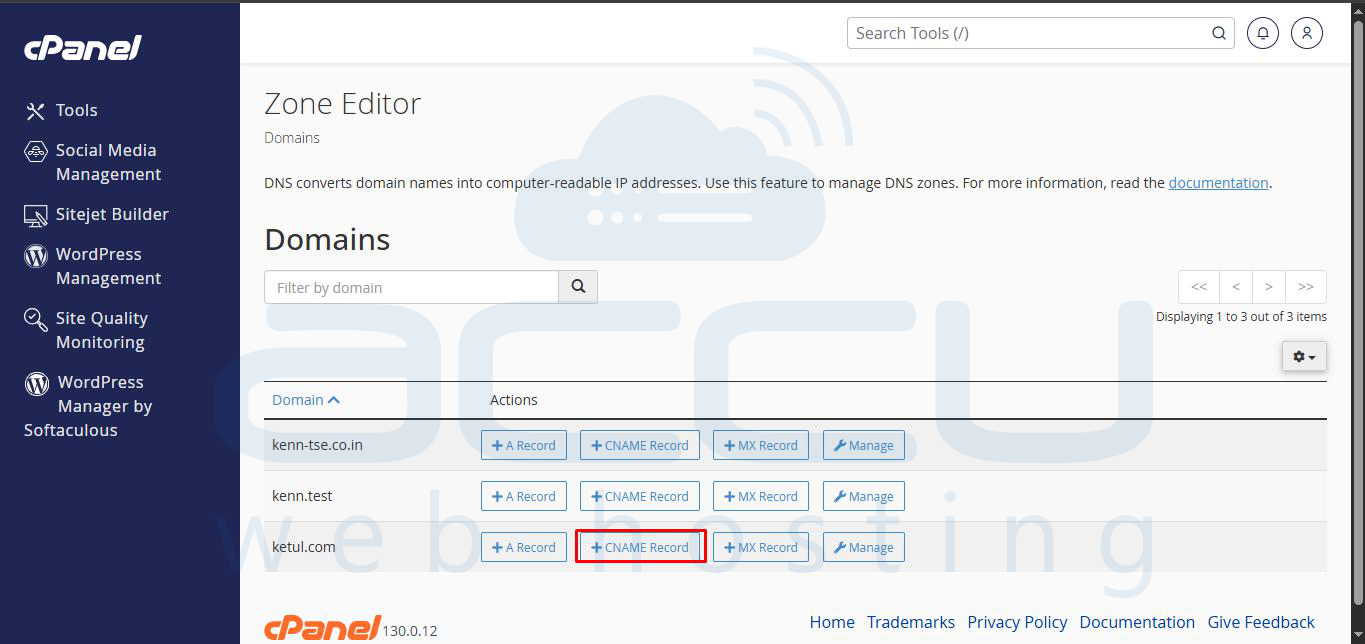
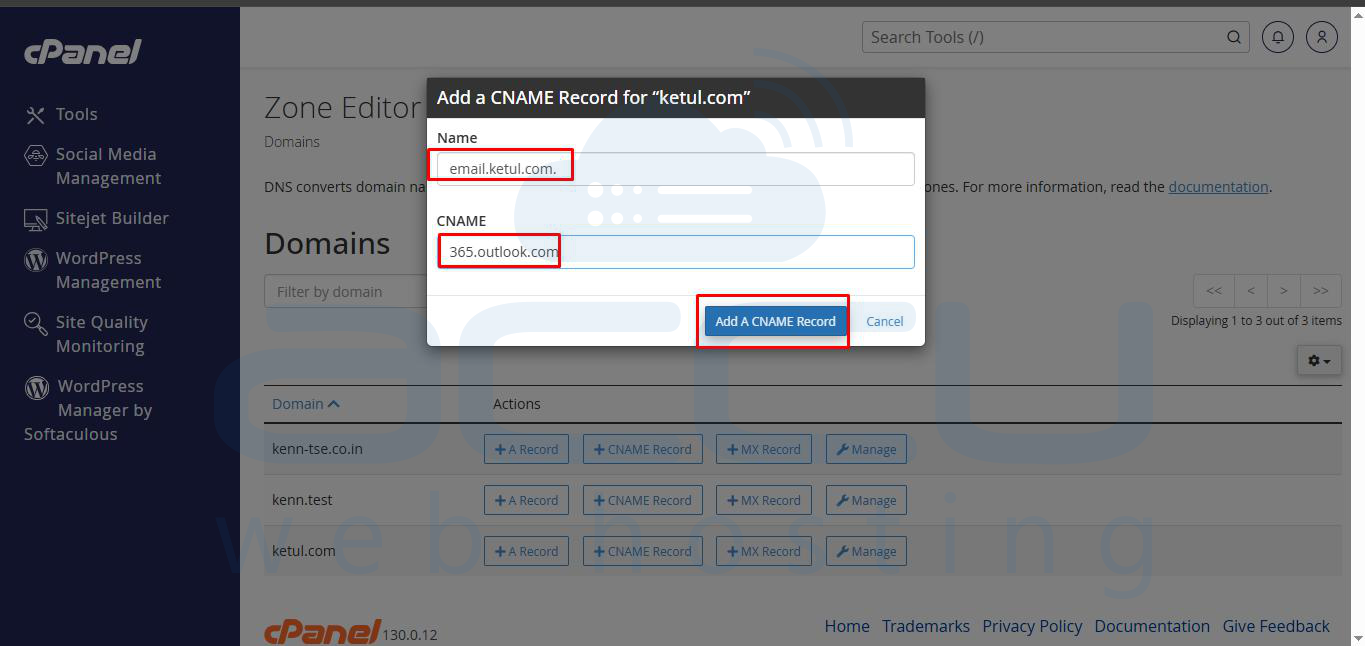
Provide the following information:
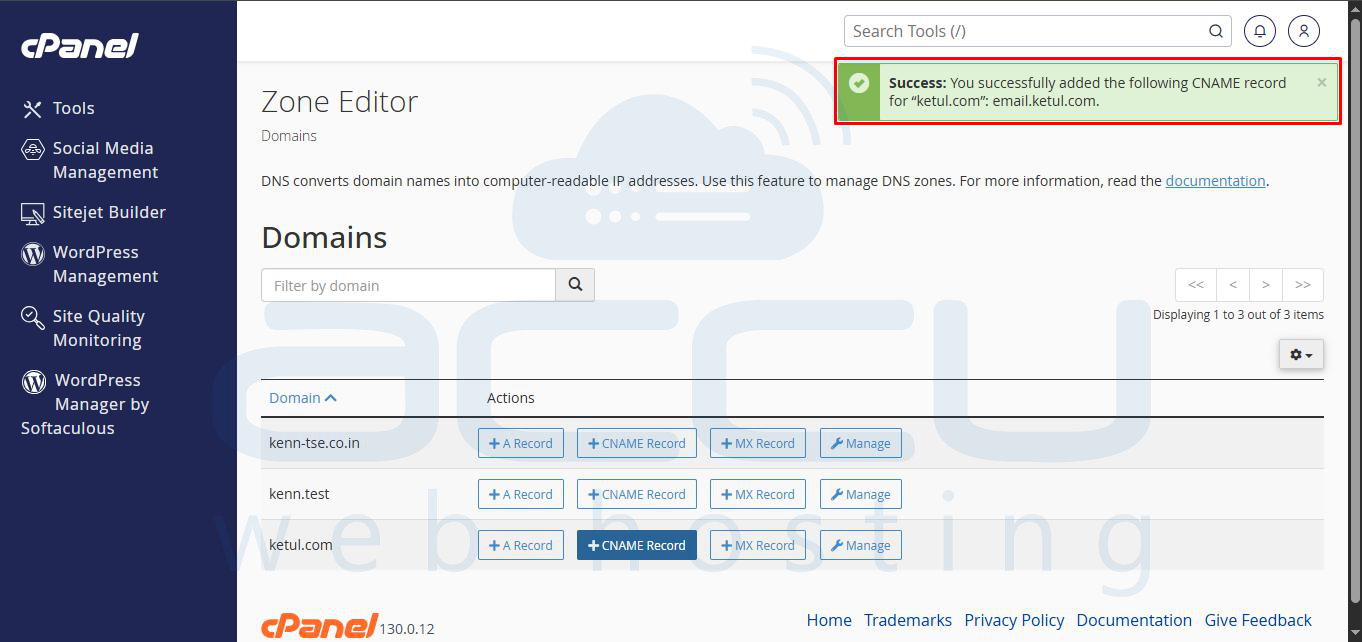
Confirm your entry by clicking the Add CNAME Record button.
A TXT record, or Text record, allows domain owners to add arbitrary text data to their domain's DNS. These are commonly used for verification purposes, such as SPF (Sender Policy Framework) and DKIM (DomainKeys Identified Mail) records for email authentication.
First, ensure you are in the domain's management view. If you are not already, click the Manage button for your domain in the Zone Editor.
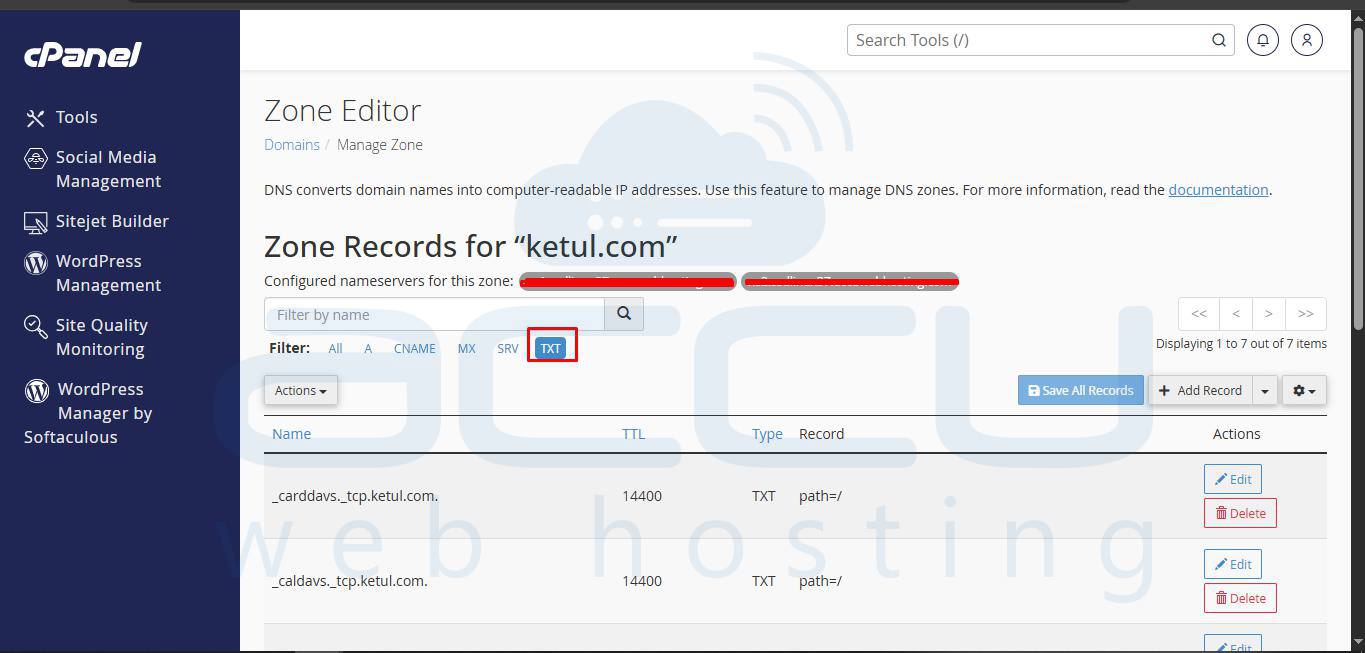
Click on the + Add Record button and then select TXT from the available record types.
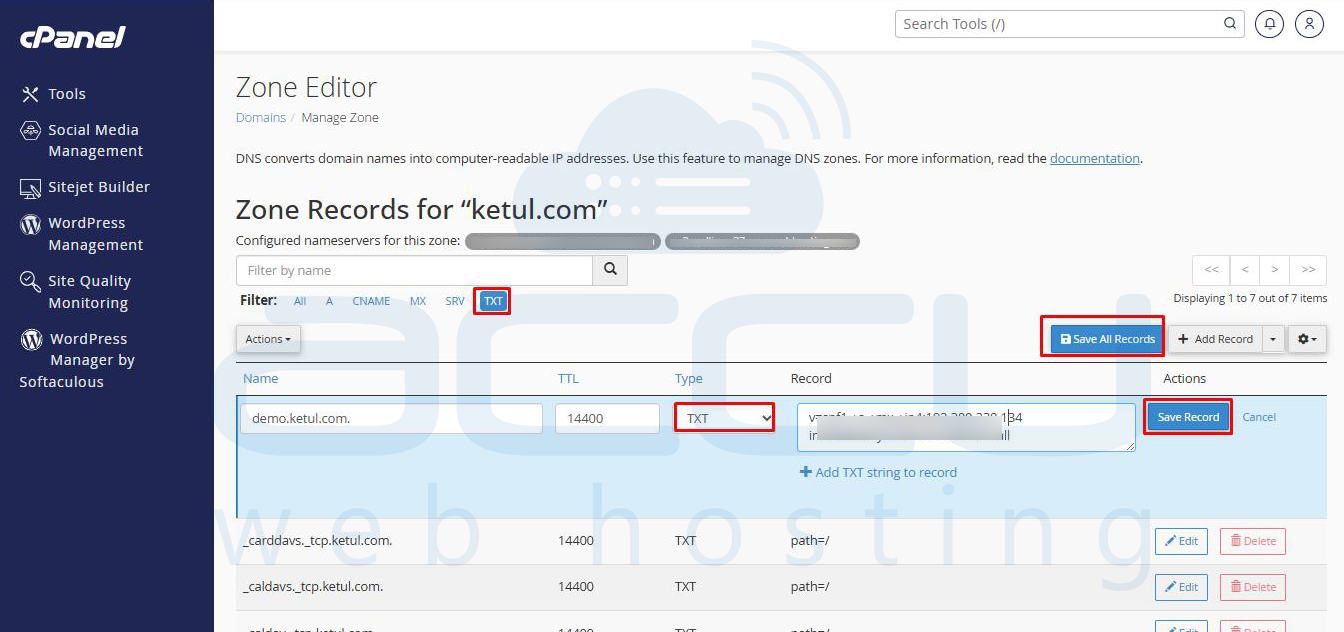
In the fields provided:
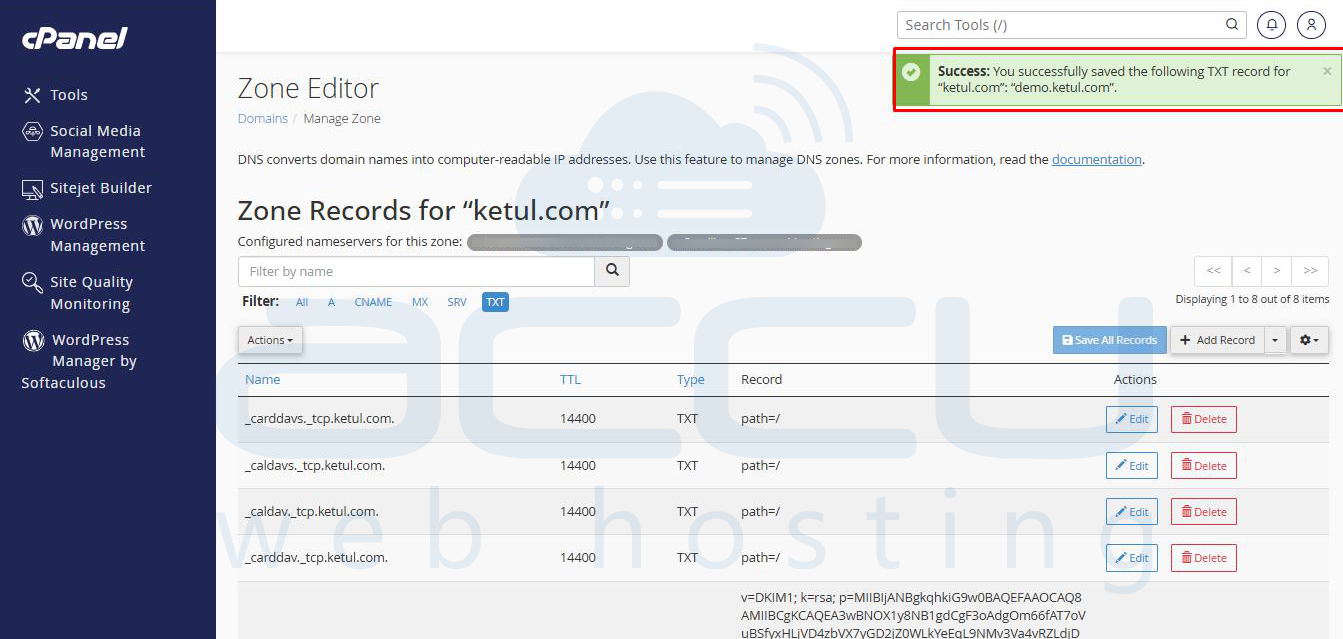
Click Add Record to save the new TXT record.
Over time, you may need to modify existing DNS records, perhaps to point your domain to a new server or update email authentication details. cPanel makes this process straightforward.
From the list of DNS records for your domain in the Zone Editor, locate the record you wish to modify. Click on the Edit option corresponding to that specific record. This action will typically be represented by an icon or text link.
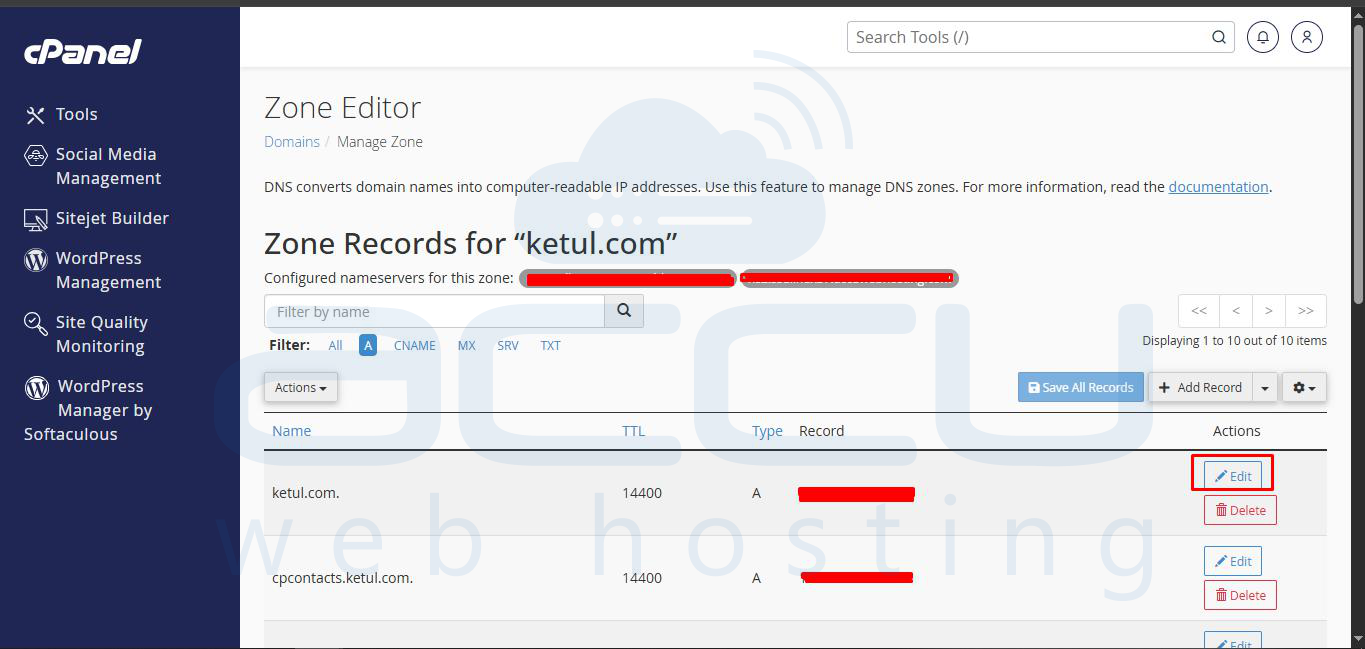
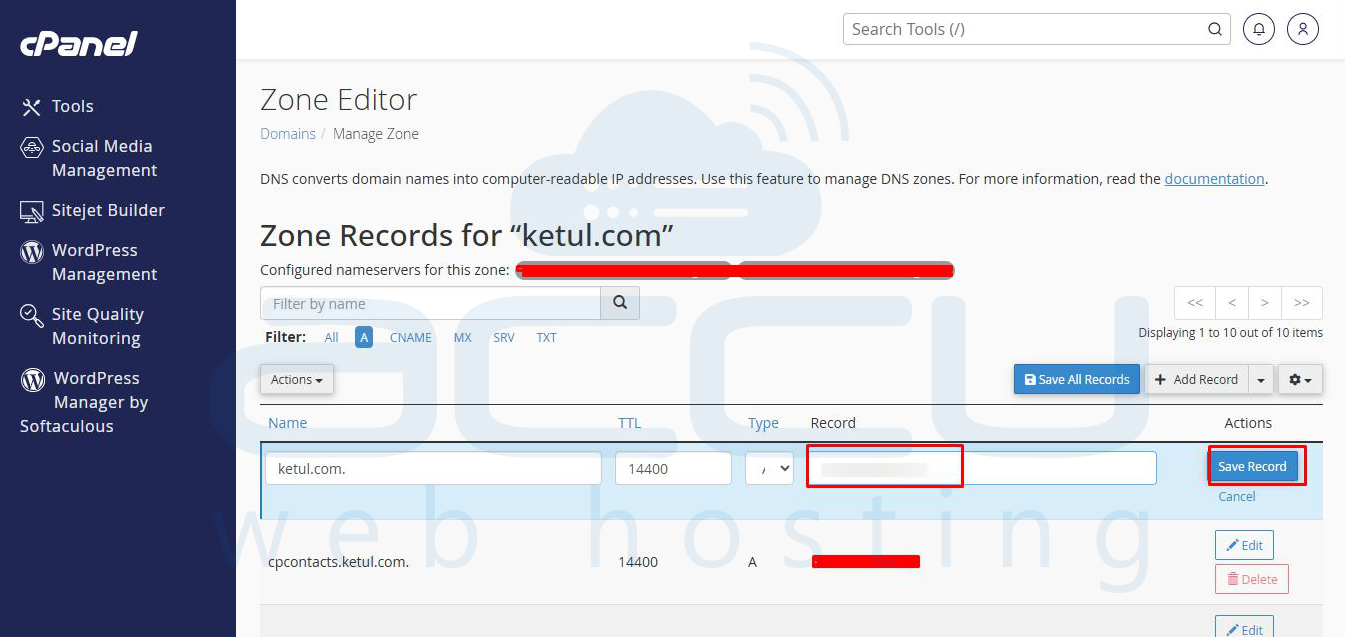
The system will load the current configuration settings for the selected record into editable fields. Make the necessary adjustments, such as updating an IP address for an A record or modifying a text string for a TXT record. Once all changes have been made, click the Save Record button to apply your updates.
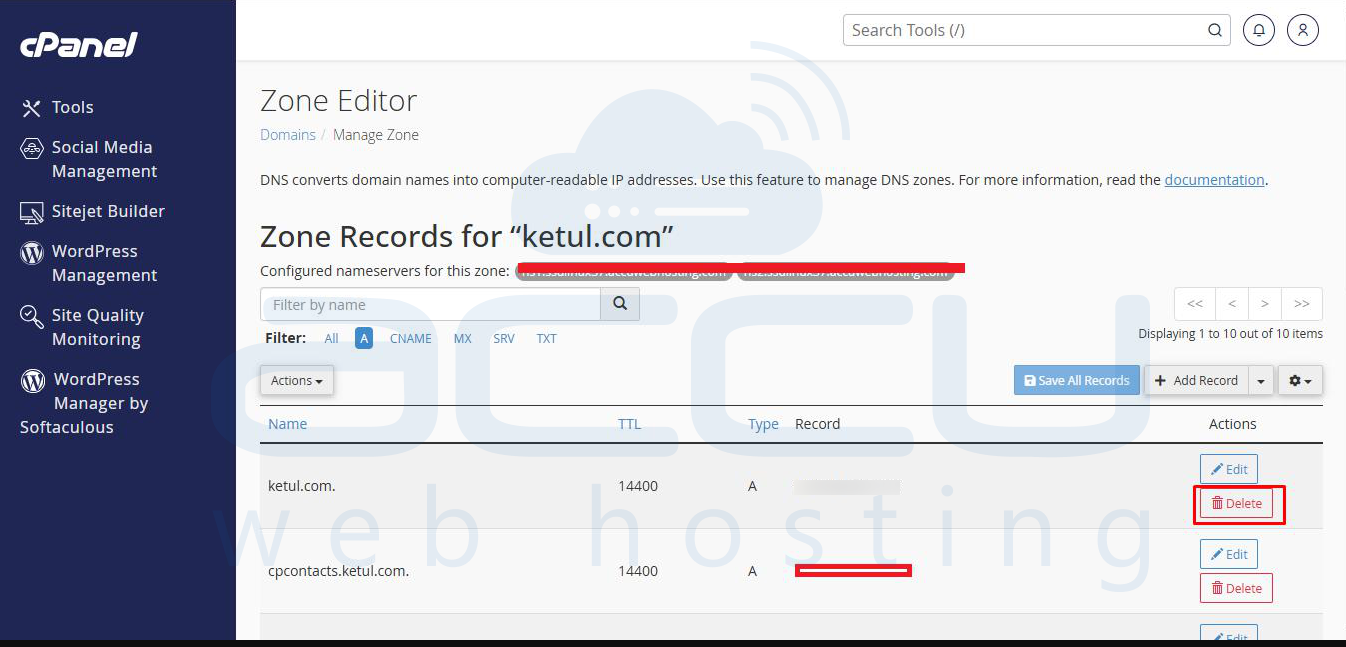
Removing DNS records should be done with caution, as deleting an essential record can disrupt associated services like your website or email. Always verify that a record is no longer needed before proceeding with deletion.
To delete a record, locate it in the list of DNS entries. Click on the Delete option. You may be prompted with a confirmation message, emphasizing the importance of ensuring the record is truly superfluous before permanent removal.
MX records are crucial for directing incoming email for your domain to the correct mail servers. Proper configuration ensures your emails are delivered reliably.
To set up a new MX record, navigate back to the Zone Editor for your domain and click on the + MX Record button.
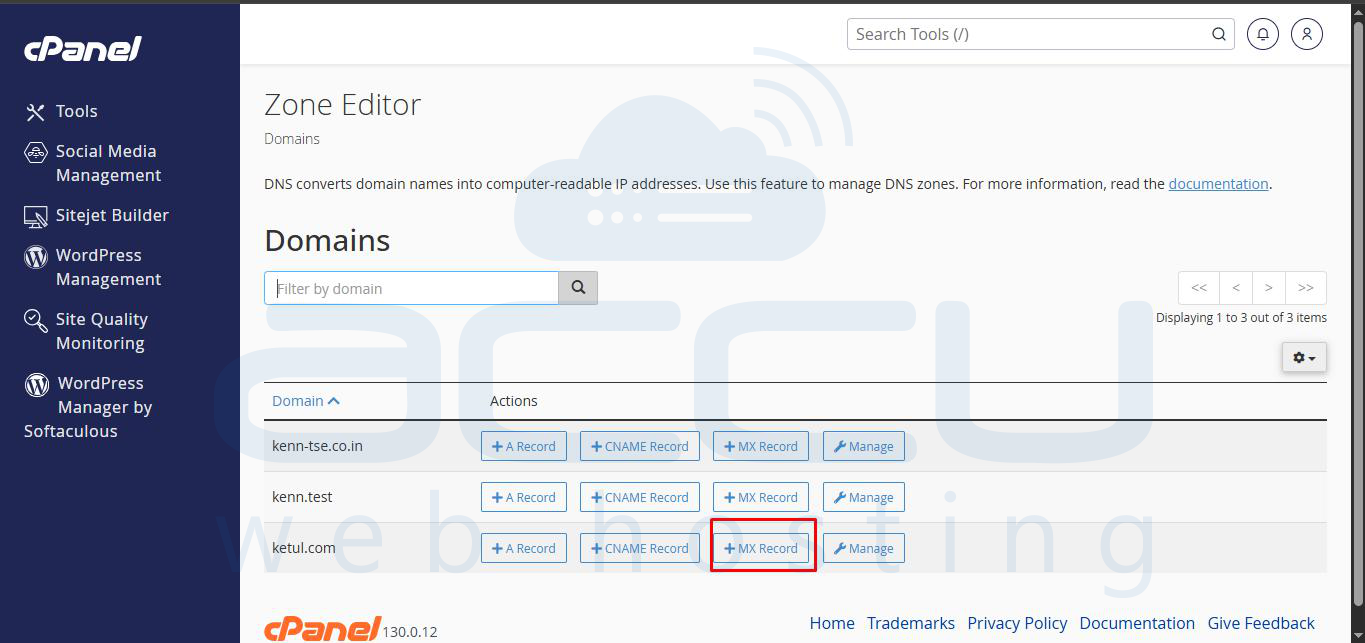
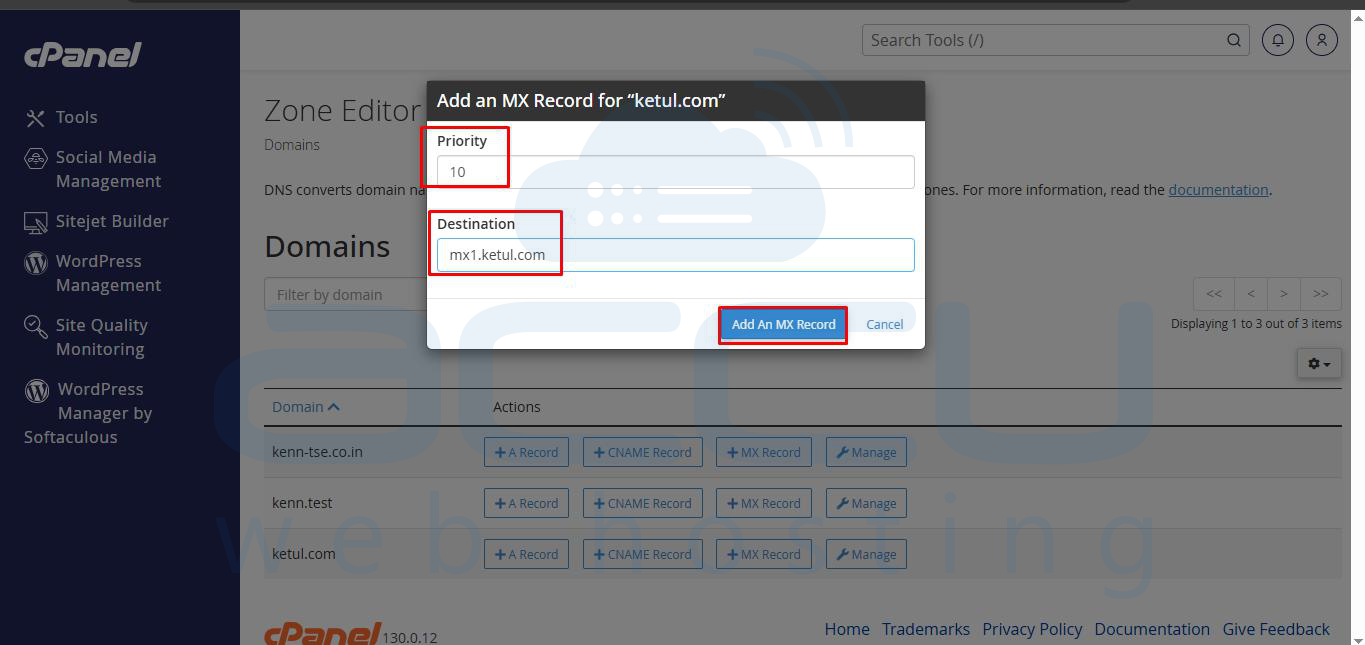
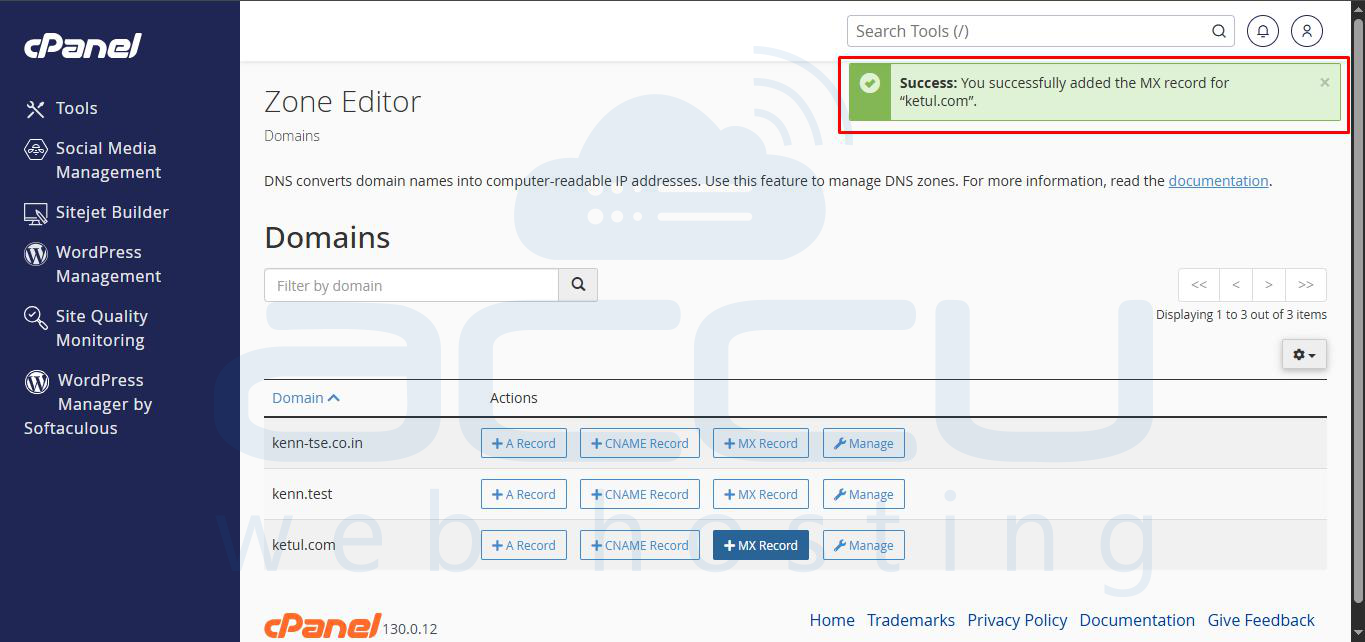
You will need to specify:
Click the Add MX Record button to save the new entry.
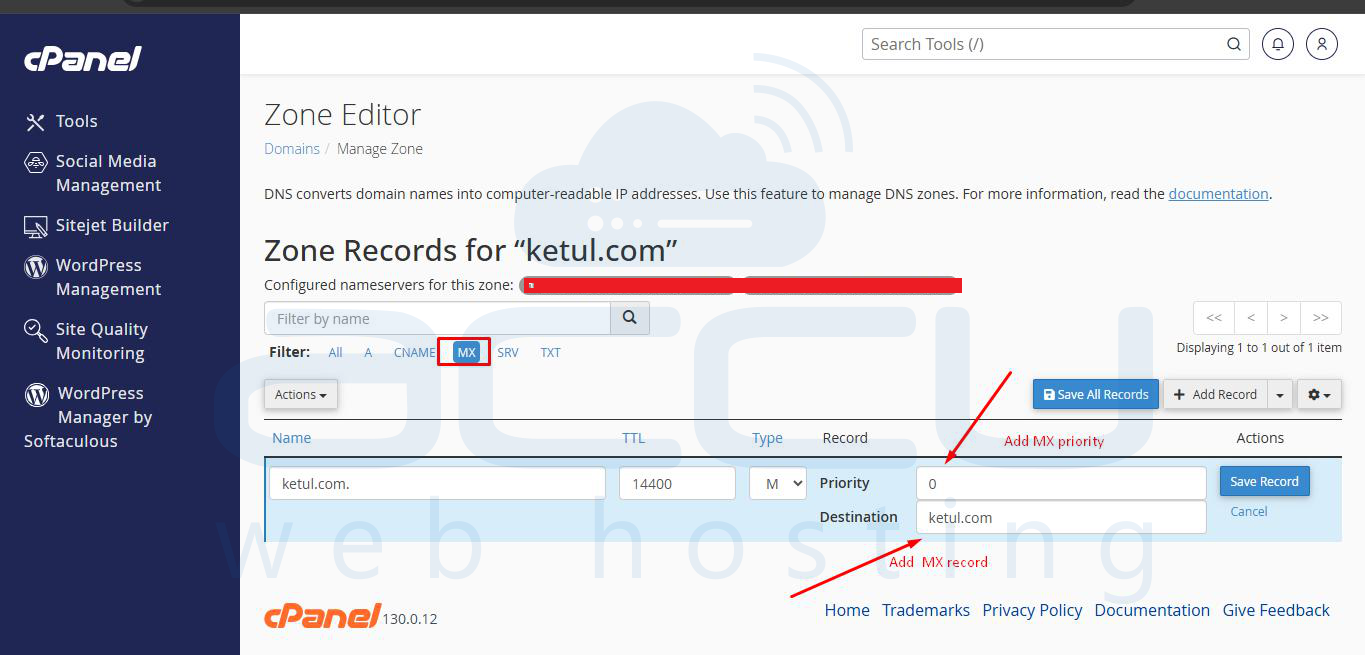
If you need to change your mail server settings, locate the MX record you wish to update in the Zone Editor. Click on the Edit option associated with that MX record.
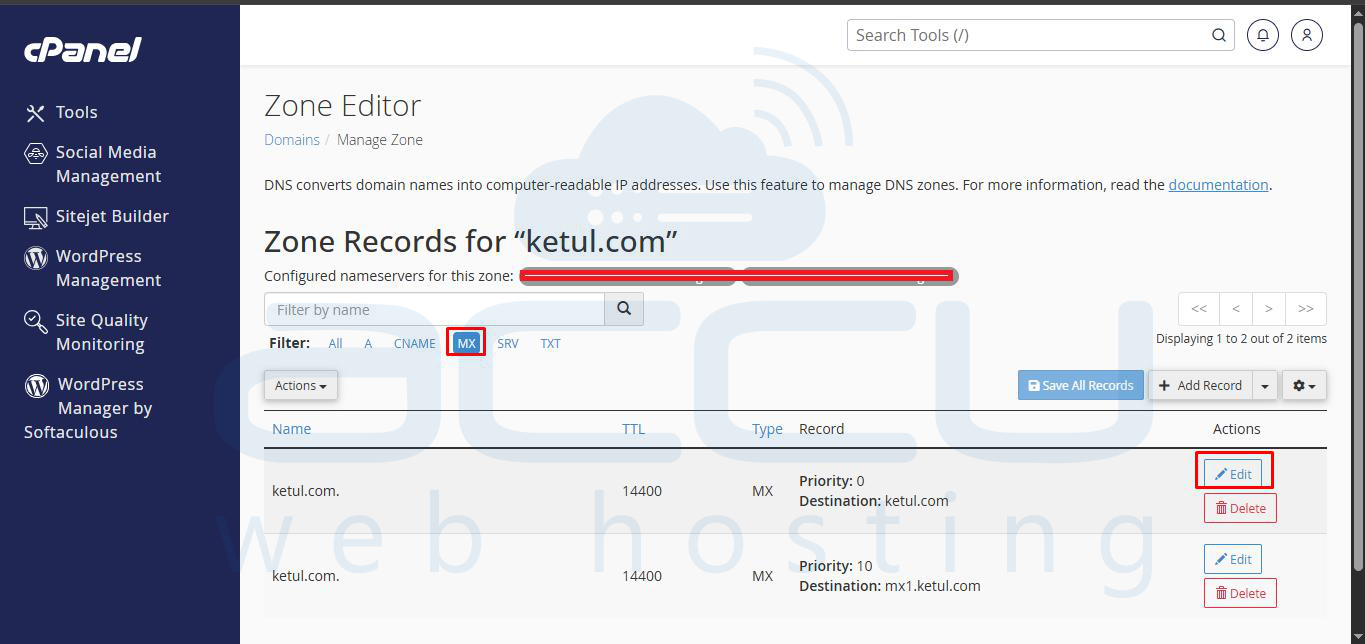
Adjust the priority or destination details as required. After making your modifications, click the Save Record button to ensure your new MX record configuration is applied.
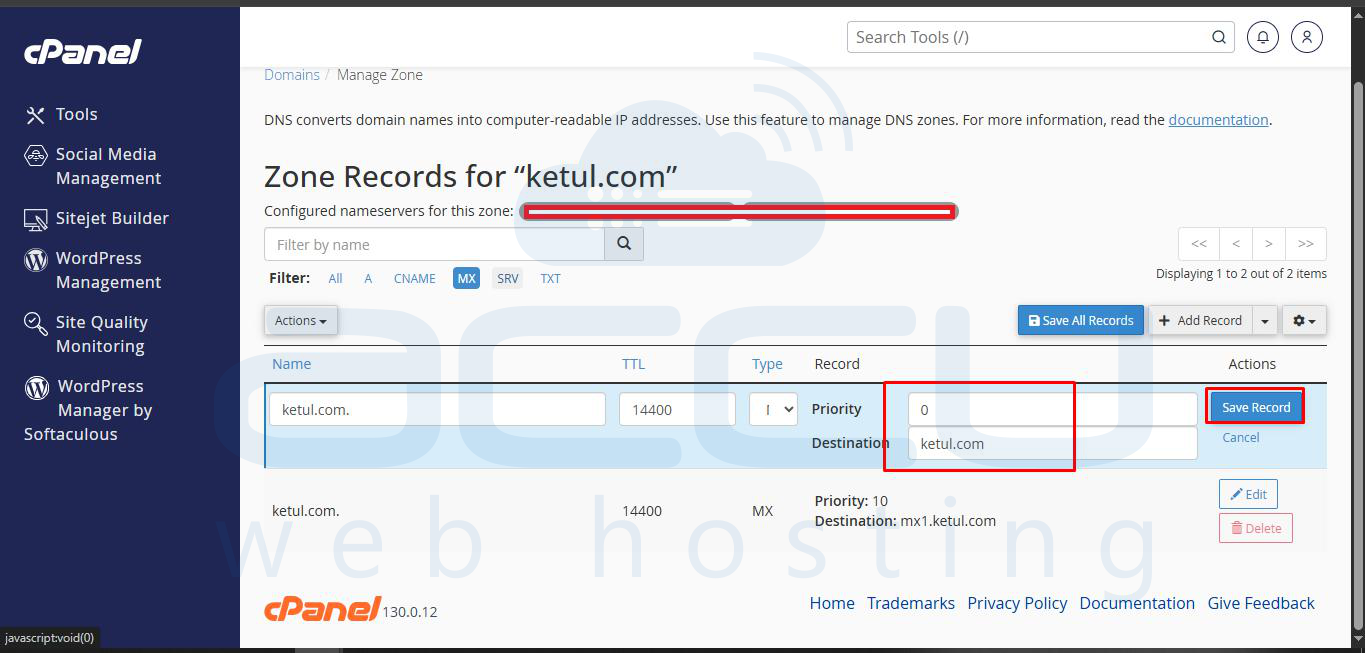
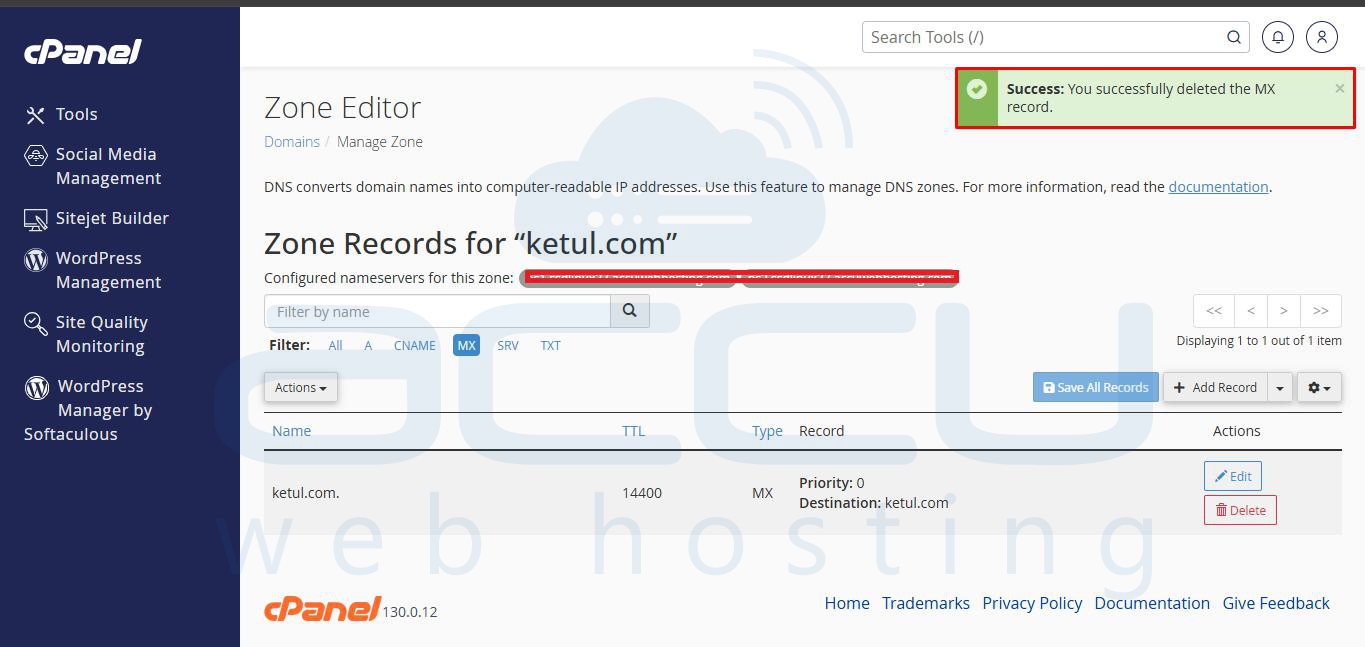
To remove an MX record that is no longer needed, find it in the list of records and click the Delete option. Be certain of your decision, as deleting an active MX record will prevent email delivery to the specified server.


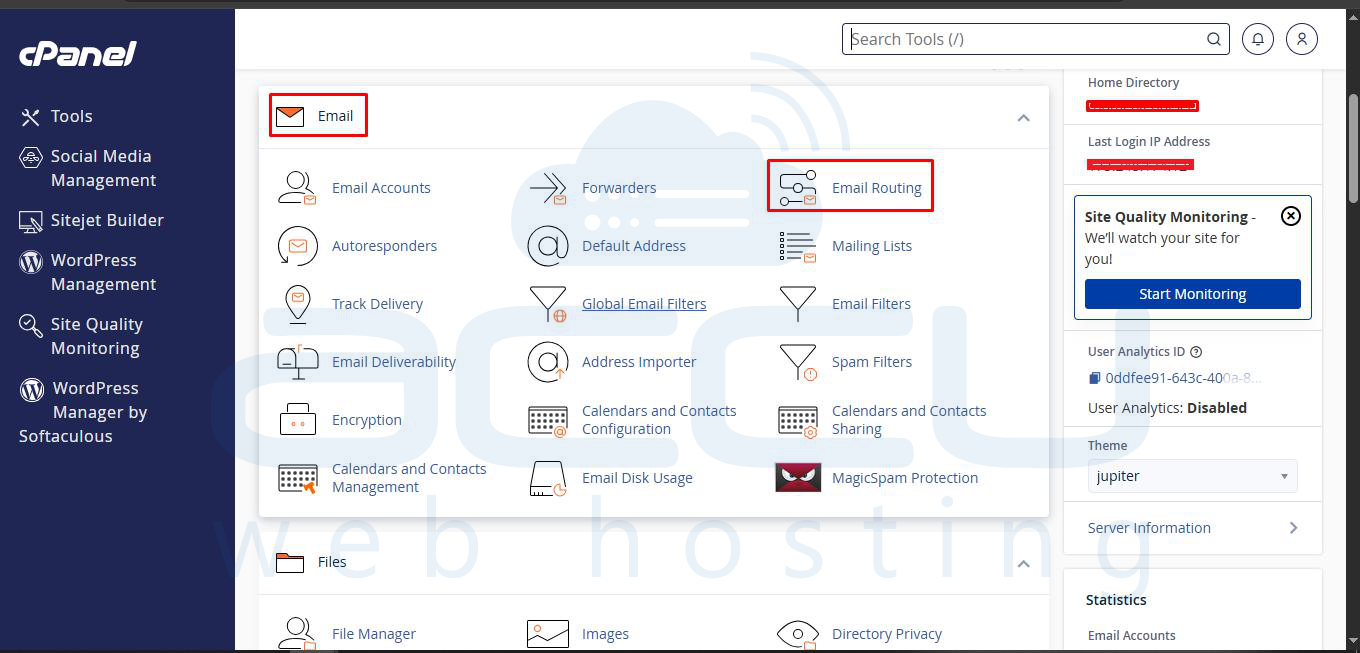
Beyond individual MX records, cPanel also allows you to define how your domain handles incoming email through its Email Routing options. This setting determines whether emails are processed by your local server or an external mail service.
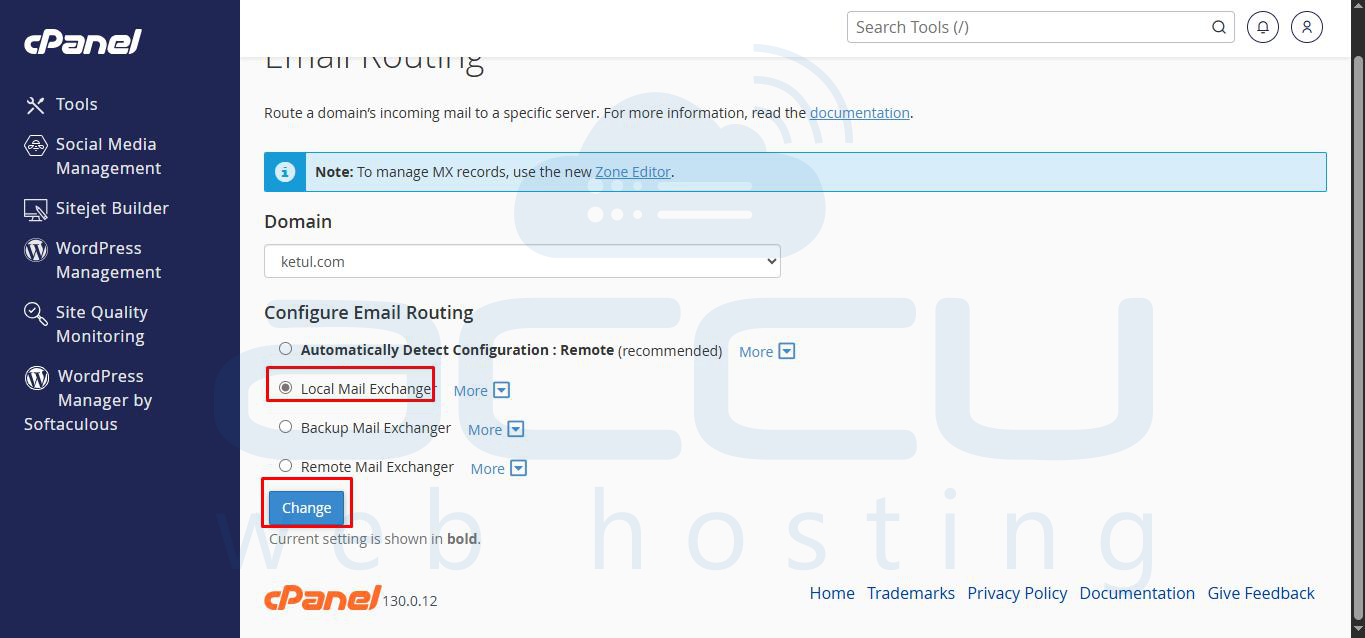
First, ensure you have selected the correct domain for which you wish to configure email routing. In the Email Routing section, you'll typically find options such as:
Choose the option that best aligns with your email hosting setup to ensure emails are routed correctly. Save your changes after selection.
It is important to understand that any changes made to your DNS records are not instantaneous. These changes need to propagate across the global network of DNS servers, a process known as DNS propagation.
Important Note: While changes to nameservers may take between 24 to 72 hours to fully propagate, modifications to individual DNS records typically require 24 to 48 hours to be reflected globally. During this period, some users may still see your domain resolving to the old settings.
cPanel offers support for various essential DNS record types, including A, AAAA, MX, TXT, and CNAME records, enabling comprehensive domain management directly from your control panel. For more advanced DNS configurations or to add less common record types beyond those supported directly in cPanel, you might need to access the DNS zone management features available through the WHM (Web Host Manager) panel, if you have administrative access.